
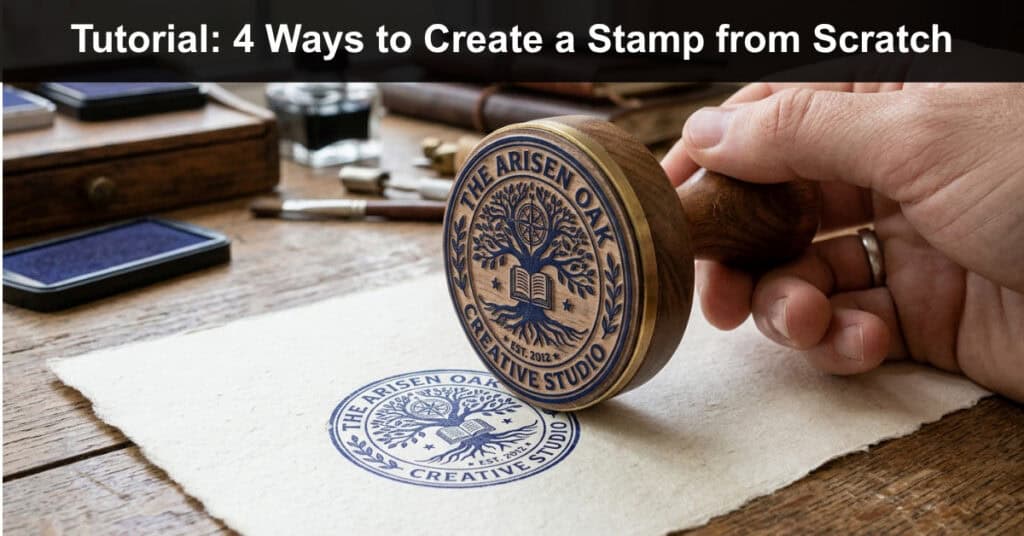
A custom stamp is a personalized or unique stamp designed for a specific use, such as on documents, packaging, or branding materials. These stamps can include various elements like logos, text (company names, addresses, or slogans), and graphics, and they’re commonly used for professional branding as well as for creative projects where people want to add a personal touch.
From browser-based constructors and AI generators to traditional hand-carving and modern laser engraving, this guide covers every major way to create a custom stamp. We have updated our methods to include AI-assisted design, which has become a remarkably fast and useful tool for modern creators.
If you want to make your branding more memorable or add an artistic touch to your packaging, follow along as we move from the easiest digital tools to more advanced manual techniques, starting with online constructors.
Method 1: MyStampReady Online Constructor

MyStampReady is the fastest route to a finished stamp design if you have zero design experience and just want something usable today. It is a free, browser-based constructor with no software installation required. The tool walks you through choosing a shape, adding text and graphics, and exporting a print-ready file suited for both digital use and manufacturing.
Its guided workflow breaks the whole process into these actions:
- Choose the Shape: Pick a circular, rectangular, triangular, or square outline for your stamp, and the silhouette appears, ready to accept the text and graphics you plan to add.
- Add and Style Text: Type the company name, address, or slogan, then adjust the font, size, and color, dragging the text into place and rotating it to balance the layout.
- Insert Graphics: Upload your own logo or use the built-in icon library, then resize and position every element carefully so that the design stays balanced and clean.
Step 1: Accessing the MyStampReady Tool
Head to the MyStampReady Constructor, an intuitive tool that runs entirely in your browser with no software download required. Open the Stamp Constructor section, which loads a blank canvas alongside the tools you will use to build your design. The free tier lets you build freely, though downloading the finished file is a paid step.
Step 2: Choosing the Stamp Shape
Pick the outline shape that fits your intended use case:
- Circular, common for logos, seals, or emblems.
- Rectangular, ideal for address stamps or business.
- Triangular or square, a less conventional alternative.
Step 3: Adding Text
Follow these simple steps to add and position your text:
- Click the Text tool in the sidebar.
- Enter your text into the field.
- Customize the font, size, and color.
- Drag the text onto the canvas and rotate it.
Step 4: Incorporating Graphics
Choose how to bring color and imagery into the design:
- If you have a logo or custom graphic, upload your own image, rendered cleanly at stamp scale.
- Use built-in icons for decorative elements and symbols.
Step 5: Finalizing Your Design
Refine the layout once every element is in place. Check the alignment, make sure nothing overlaps awkwardly, and confirm the text stays legible at the size you plan to print or engrave. A step back from the screen often reveals balance problems you missed on close view, and a polished result reinforces your brand identity.
Step 6: Save and Export Your Design
Export your finished stamp as PNG, SVG, or PDF, and choose SVG when you send the file to a manufacturer or laser engraver because it stays sharp at any size. From there, you can forward the file for production or use it digitally, and most vendors accept at least one of these common formats without complaint.
Real-Life Example: A small bakery needed a brand seal for its pastry boxes but had no design staff. Using the constructor, the owner picked a circle, added the shop name, and uploaded a small cupcake logo in under an hour, then exported an SVG for the printer that same week.
Method 2: Designing With Graphic Design Software
If you are comfortable with design software, programs like Adobe Illustrator, Photoshop, or CorelDRAW give you far more control over the final result than a stamp-specific constructor ever can. Browser-based options such as Canva or Figma are common alternatives for people who want more flexibility than a template builder without taking on the steep learning curve of a professional tool.
The design workflow in these programs relies on these steps:
- Set the Canvas: Create a new file at the stamp’s true dimensions and set the resolution to 300 DPI, which keeps the artwork sharp for print or engraving.
- Build the Shape: Draw the outline with the shape tools, add your text, and import logos or icons, adjusting their size, position, and color until it all fits together well.
- Fine-Tune Details: Adjust kerning and letter spacing, apply effects, and confirm that no lines are so thin they disappear once the design is stamped, engraved, or inked.
Step 1: Set Up Your Canvas
Create a new canvas sized to your stamp’s actual dimensions, then set the resolution to 300 DPI so the artwork stays crisp for print or engraving. Matching the file to the finished size from the start avoids rescaling later, which can soften vector edges and blur any embedded raster images you import during the design phase.
Step 2: Build the Design
Assemble the stamp step by step using these core elements:
- Start with the basic shape, since circles and rectangles are most common.
- Add text, curving it around a circular seal with vector tools.
- Insert graphics, adjusting size, position, and color.
Step 3: Fine-Tune
Use the software’s advanced tools to adjust kerning, apply effects, and make sure every element aligns precisely. This is also the stage to double-check that no lines are too thin to reproduce clearly once stamped, a common issue with intricate designs that look fine on screen but vanish after they have been inked onto paper.
Step 4: Save & Export
Export in a high-resolution format such as SVG or PDF, which preserve vector graphics cleanly at any scale and are generally preferred for stamp manufacturing. PNG and EPS also work depending on what your manufacturer or engraver requests, so confirm the exact accepted formats before you finalize the file and send it off for production.
Real-Life Example: A freelance designer made a circular seal for a client’s notary service in Illustrator. She curved the firm name around the ring, welded the vector shapes together, and exported a crisp PDF that the manufacturer accepted on the first attempt without any request for rework or layout changes.
Method 3: AI Stamp Generators
A newer category of AI-powered stamp and seal generators, including tools like Dreamina’s stamp generator, Stampdy, and PixSprout, can turn a plain text description or an uploaded logo into a polished, print-ready seal in seconds. You skip the manual layout work entirely and receive several design variations to compare in a single session, which suits people with no design background at all.
Using a dedicated AI stamp generator follows a simple flow:
- Describe or Upload: Type a written description or upload an existing logo, sketch, or photo, and the tool adapts it to stamp conventions while keeping the original composition intact.
- Generate Variations: The AI returns several drafts at once, and you can regenerate or edit specific sections such as a border, an icon, or one line of text.
- Check Print Readiness: Confirm that stroke weights survive engraving, verify outer-ring text stays legible at small sizes, and always inspect the design at its final actual printed scale.
Step 1: Choose an AI Tool
Pick a tool that matches what you are starting from:
- Text-to-stamp tools build a design from a written description, such as a circular notary seal.
- Image-to-stamp tools turn an existing logo or sketch into a clean seal.
Step 2: Generate and Refine
Describe your design or upload your source image, then let the AI produce a first draft. Most of these generative AI tools create several variations at once and let you regenerate or fine-tune specific sections, such as a border, an icon, or one line of text, without rebuilding the entire design from scratch every time.
Step 3: Check Print Readiness
Confirm the design will reproduce well as a physical stamp:
- Stroke weights must be thick enough to survive engraving and inking.
- Outer-ring text should stay legible at sizes of roughly 30 to 40 millimeters.
- Zoom out and check at actual size, since fine detail can vanish once inked.
Step 4: Export
Download the design as an SVG or PDF for engravers and manufacturers, or use PNG for digital purposes and quick approvals. Most of these tools export watermark-free files with transparent backgrounds at no cost, though the available features and limits vary from one platform to the next, so review each one carefully before you commit.
Real-Life Example: A startup owner needed a custom company seal for her invoices but had no designer on hand. She described the concept in a single sentence, picked a circular draft the AI produced, and downloaded a transparent SVG the same afternoon, then had it engraved the next week locally.
Method 4: Hand-Carved or Laser-Engraved Rubber Stamp
Some people dismiss hand-carving as old-fashioned, the kind of potato or sponge stamp from elementary school art class. Yet it remains a genuinely satisfying, hands-on method rooted in traditional printmaking techniques, and it now has a modern counterpart in laser engraving, which keeps the same DIY spirit while producing sharper, more precise, and far more durable results.
Your choice between them depends on the tools you own:
- Gather the Materials: For carving, you need a rubber block, a carving tool set, tracing paper, a pencil, and an ink pad, all available at most craft stores.
- Build the Design: Sketch the artwork mirrored, then either carve the pattern out by hand or prepare a clean vector file for a desktop laser engraver to follow.
- Test and Finish: Always test on scrap material first, touch up any weak areas, then mount the finished rubber to a handle or a self-inking base for daily use.
Hand-Carving
Gather these materials and the right tools before you start:
- A block of rubber from a craft store.
- A carving tool set.
- A pencil and tracing paper.
- An ink pad.
Then work carefully through these steps to finish the carving:
- Sketch the design, remembering it prints mirrored, so reverse any text.
- Transfer it by tracing, flipping it onto the rubber, and rubbing the back.
- Carve away the excess rubber around the pattern, going slowly on fine details.
- Test on an ink pad and paper, then touch up weak areas.
- Use the stamp, which has a rustic look for crafts.
Laser Engraving (the modern alternative)
If you have access to a desktop laser engraver, such as the xTool F1, Monport, or Trotec’s Speedy series, you can get hand-carved-level personalization with far more precision and none of the manual carving. The machine does the detailed work faithfully once you set the design, the depth, and the material correctly ahead of time.
The laser engraving workflow comes down to these simple steps:
- Prepare the design in vector software or export one, mirrored.
- Choose laser-safe rubber or polymer sheets and clean the surface.
- Import the file into the engraver’s software and set the depth to about 0.8 to 1.5 millimeters.
- Run a test engraving on scrap, then engrave the full design.
- Clean, dry, and mount the rubber to a handle or self-inking base.
Laser engraving produces sharper, more consistent impressions than hand-carving and holds up to far more use, and some laser-engraved stamps are rated for thousands of impressions before wearing out. It is a worthwhile upgrade if you make stamps regularly rather than as a one-off craft project, since the upfront equipment cost pays off with volume.
Real-Life Example: An artist wanted a distinctive mark for the greeting cards she sells online. She carved a small sunflower into a rubber block one evening to match the rough, handmade look of her brand, and the finished stamp became a consistent signature on every card she shipped to her customers.
Method 5: Ordering a Custom Stamp Online
Ordering a custom stamp online is the simplest route if you would rather skip the design work entirely or just need a standard self-inking office stamp without manufacturing know-how. You describe or design what you want through a vendor’s interface, and a finished, ready-to-use stamp arrives at your door with no software on your end.
Ordering a stamp from a vendor follows a short sequence:
- Compare Vendors: Review several sites for design tools, stamp styles, pricing, and turnaround times, ranging from simple self-inking office stamps to specialty notary, date, and address versions.
- Customize the Design: Use the platform’s editor to set the shape and size, add text in various fonts, and upload a logo, previewing the result before you check out.
- Review and Confirm: Check the alignment and legibility carefully on the preview, since most vendors will not let you make changes once your final stamp has entered production.
Step 1: Select a Vendor
Many different sites offer custom stamp ordering, and each one has slightly different design tools and stamp styles, ranging from basic self-inking office stamps to specialty notary, date, and address versions. Compare the features, pricing, delivery times, and customer reviews, and run a quick competitive analysis before you commit to any single vendor at all.
Step 2: Design Your Stamp
Most of these platforms offer a simple editor where you can:
- Select the stamp’s shape and size.
- Add text in various fonts and sizes.
- Upload images or logos.
Step 3: Review and Order
Review your design carefully before ordering, checking the alignment and legibility, because most vendors will not let you make changes once the stamp is in production. When you are satisfied with the preview, place your order, and the finished stamp ships directly to you, usually arriving within a few working days depending on the vendor.
Real-Life Example: An office manager ordered a self-inking address stamp for the mailroom. She entered the company address, chose a clean font, and previewed the layout on the vendor’s editor, then received the finished stamp within a week, and the final product matched the approved preview with no surprises at all.
Conclusion
Whether you choose a browser-based constructor, dedicated design software, an AI generator, hands-on carving or laser engraving, or a done-for-you online order, each method has its place. The right pick for creating a personalized stamp depends on how much control you want versus how quickly you need a finished stamp, and on whether you enjoy the craft or prefer the convenience of ordering through an outside vendor.
Custom stamps give documents, packaging, and branding a personal, professional finish, and creating one is more achievable than most people assume. Start with the approach that fits your skills and timeline, and remember that you can always graduate to a more advanced method later. Whatever route you choose, the finished result will be worth the effort you put in.
Frequently Asked Questions About Custom Stamps
Do I need design experience to make a custom stamp?
No. Constructor tools like MyStampReady and AI generators such as Dreamina, Stampdy, or PixSprout are built for people without design backgrounds. Graphic design software and laser engraving give you more control but come with a steeper learning curve, so most beginners start with a constructor or an AI tool and move on only when they need finer detail.
Which file format should I use for manufacturing?
SVG or PDF, generally. Both are vector formats that stay crisp at any size, which matters for engraving and for production files. PNG is fine for digital use or quick approvals but can lose sharpness when scaled up, so check what your vendor accepts before you export the final design from whichever tool you chose.
Why does my design need to be mirrored?
Because a stamp transfers ink in reverse, whatever is raised on the stamp face prints as a mirror image of the original artwork. This matters most for hand-carving and laser engraving, where you create the stamp face yourself. Most online constructors and manufacturers handle the mirroring automatically, so you only worry about it with hands-on methods.
How long does a stamp last?
It depends on the method you choose. Hand-carved rubber wears down with heavy use, while laser-engraved rubber and commercially manufactured stamps hold up much better, and some laser-engraved versions are rated for years of regular use before the impression starts to degrade. Proper cleaning and careful storage also extend the life of any stamp you own.
Is AI-generated stamp design good enough for professional or legal use, such as notary stamps?
It can be a strong starting point, but always check your jurisdiction’s specific requirements for notary or official seals before you finalize a design. Wording, dimensions, and required elements vary by location, and an AI tool will not know your local rules. Review the output against an official template and adjust it before you approve anything.
Suggested articles:
- How Project Managers Are Using AI Motion Graphics to Transform Stakeholder Communication
- Top 9 Logo Makers to Create Stunning Designs
- Top AI-Powered Tools Shaping the Future of Logos

Daniel Raymond, a project manager with over 20 years of experience, is the former CEO of a successful software company called Websystems. With a strong background in managing complex projects, he applied his expertise to develop AceProject.com and Bridge24.com, innovative project management tools designed to streamline processes and improve productivity. Throughout his career, Daniel has consistently demonstrated a commitment to excellence and a passion for empowering teams to achieve their goals.